How To Send Autopilot Outreach
How Autopilot Works
Autopilot runs your cold outreach automatically. You load the leads; the system writes the emails, drips them out on a steady schedule, handles the follow-ups, and pauses for replies.
You respond to the people who are interested.
Watch the 2-minute walkthrough above, then use this page as your reference.
The Autopilot Process
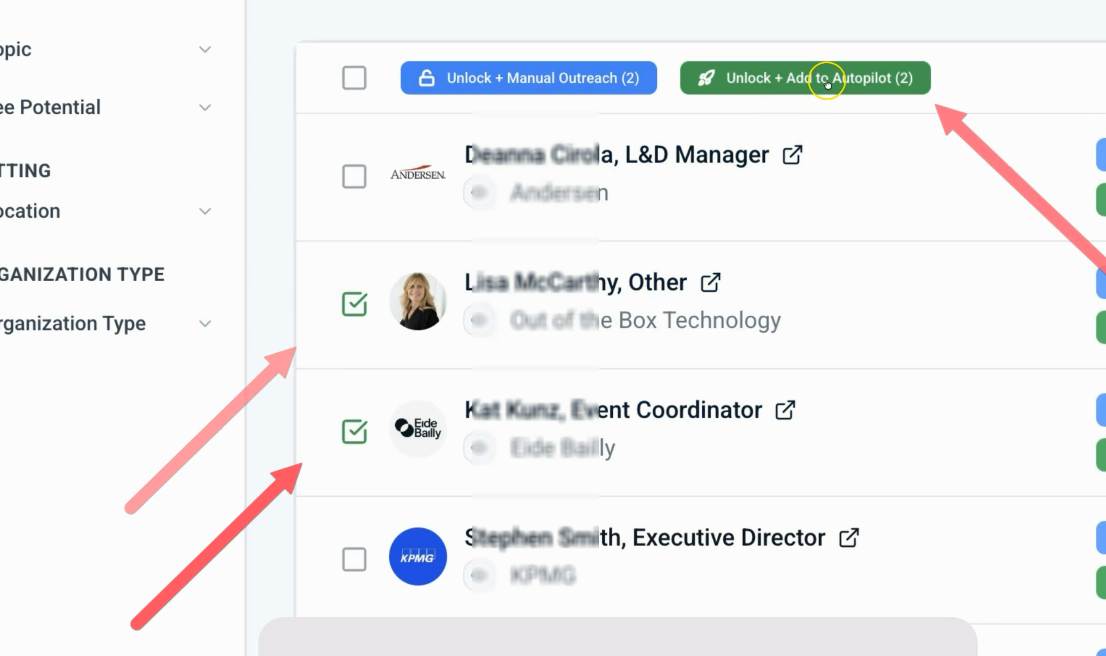
Step 1 - From “Find Leads”, add leads to Autopilot
Go to Find Leads and check off the leads you want to add. You can also add leads one at a time by clicking the green button next to each lead:
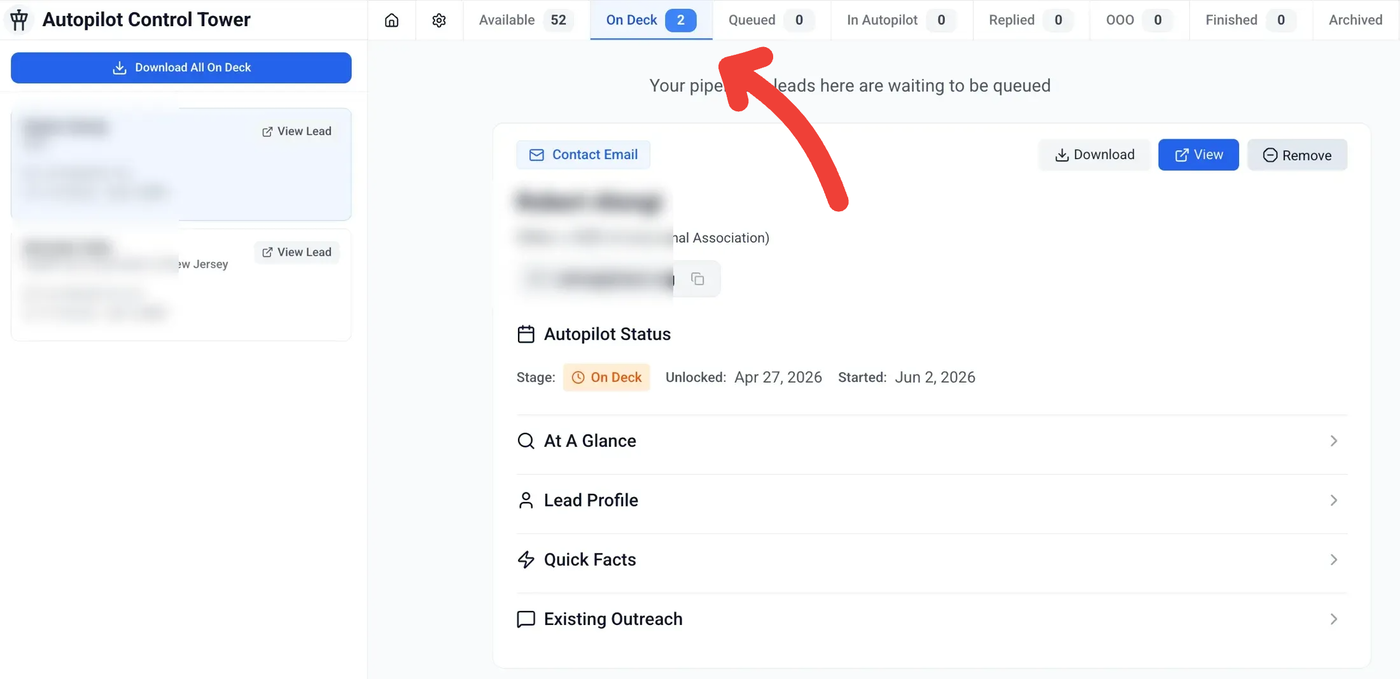
Step 2 - The Leads Land In “On Deck”
Click over to Autopilot in the left sidebar. The leads you just added will be in “On Deck”. On Deck is your holding area. Add as many leads as you want. Every day, roughly 25-30 leads will move from On Deck into Queued.
That means, if you add for example 200 leads at a time into Autopilot, each day the system will automatically draw down from the 200 as they move along the process.
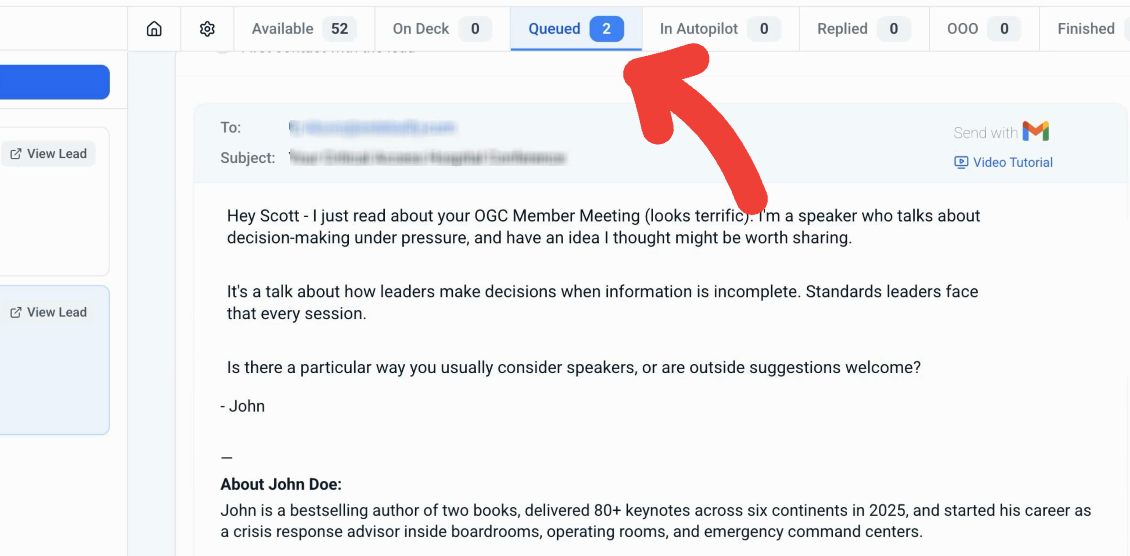
Step 3 - Every Day, A Batch Moves Into Queued
After a few minutes, the daily batch move into Queued. At this point, the full email sequence — the initial email plus follow-ups — is written for each lead. You can edit everything, remove the lead, or send it immediately instead of waiting. The leads will stay in queued for at least 12 hours before sending.
After this point, the leads will move into the autopilot phase and begin sending (step 4 below).
Step 4 - The Queued Batch Moves Into Autopilot And Begins Sending
After the 12+ hour waiting period, the batch (of roughly 25-30 leads) moves into Autopilot and begin sending. You can still edit the follow ups if you’d like.
The next batch of leads gets pulled from On Deck into Queued, and the process starts over again.
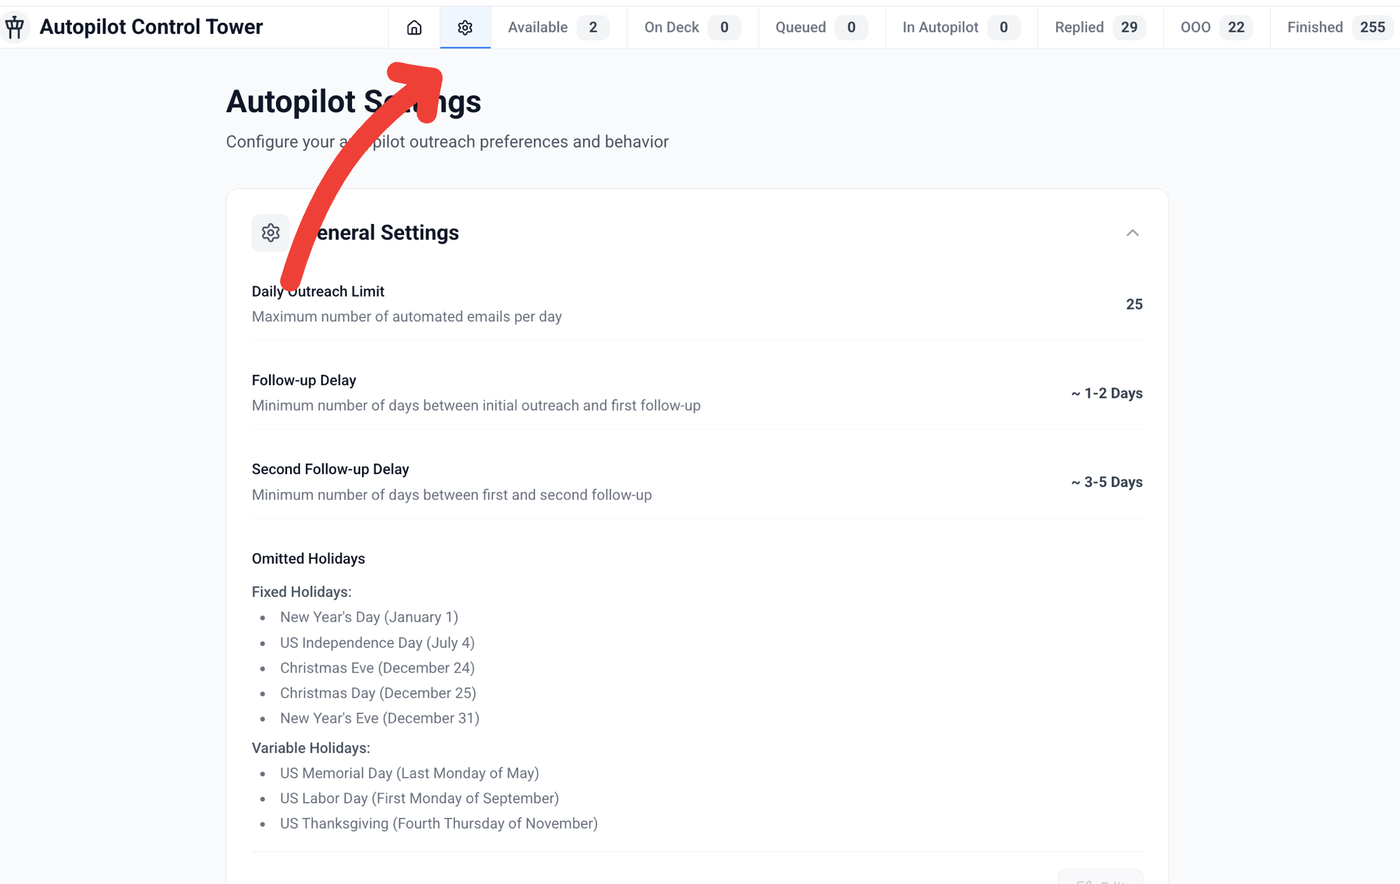
Autopilot Settings And Other Phases
Same settings as the composer — applied to every Autopilot lead
These are the same outreach generation settings you use when sending manually. Any changes you make here apply to all subsequent leads that run through Autopilot.
Available
Leads ready to be added to Autopilot
Leads you've unlocked but haven't added yet. They sit here, ready, until you move them in — nothing sends from this stage.
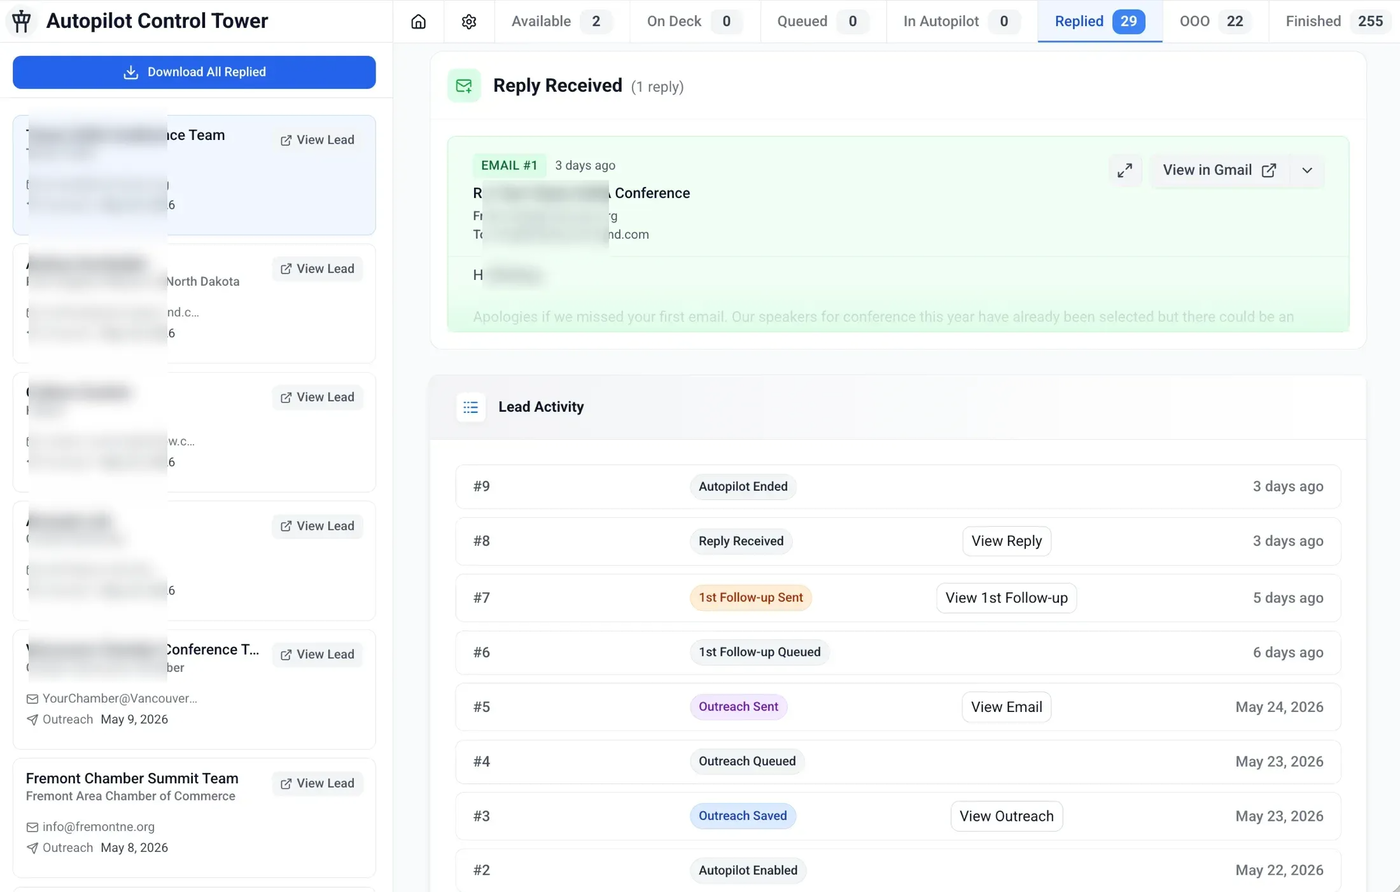
Replied (Including Activity Log)
They replied — your turn
When someone responds, they land here. You'll also see the reply in your Gmail inbox - you reply right from Gmail, like any normal email.
View any lead in Autopilot to see its complete activity log — every step, timestamped.
You can view the actual email sent at each step, so there's never a question of what went out or when.
Out of Office
They're away — follow up when they're back
An automatic out-of-office reply came back. These are set aside so you can circle back when the person returns.
Finished
Sequence complete
Autopilot ran the full sequence — initial outreach plus all follow-ups — with no reply. Nothing further sends to these leads.
You're Always in Control
Automated doesn't mean hands-off. At any stage before a message sends, you can:
Edit the email or follow-up text inline
Remove a lead from Autopilot entirely
Review exactly what was sent, and when, from the lead's activity log
How To Use Autopilot
Autopilot is meant to save you time and streamline the entire outreach process from start to finish.
As such, we recommend you add leads to Autopilot, in bulk, from Find Leads. Then just let the process unfold from there - nothing else you need to do.
After you add leads to On Deck, you can let the system fully take over.
This means, you can do an entire month’s outreach in just 1 sitting. You can be in SpeakerDrive once a month, add all your leads, and then come back next month when your unlocks reset.
Note: Autopilot sends from your Gmail account, so make sure you've connected your email and set up your signature before adding leads. [Learn more: to set up your signature →]